— Appendix: Newly you can use the discount code “MSN10” when buying Luminar, which gives you 10% discount! The code can be entered within checkout.
I have been implementing Luminar Neo software as a Photoshop plug-in into my photo editting workflow for some time now (about 2-3 years). At first I was doubtful about its purpose and rather intended to stick to established practices and improve them. But that has changed, and today I consider Luminar to be a complementary, yet important part of my photo editing process.
Luminar approached me some time ago to see if I was interested in becoming involved in their ambassador program. I had no interest in the software until then, but when the opportunity to test it came up, I decided to give it a try (without high expectations). I wanted to test the software honestly first before writing anything about it – of course I haven’t been testing the software for a long time now and I actually use it regularly, so it’s really time to write about it:-).
 Illustration of the Mystical filter – rather distinctive setting
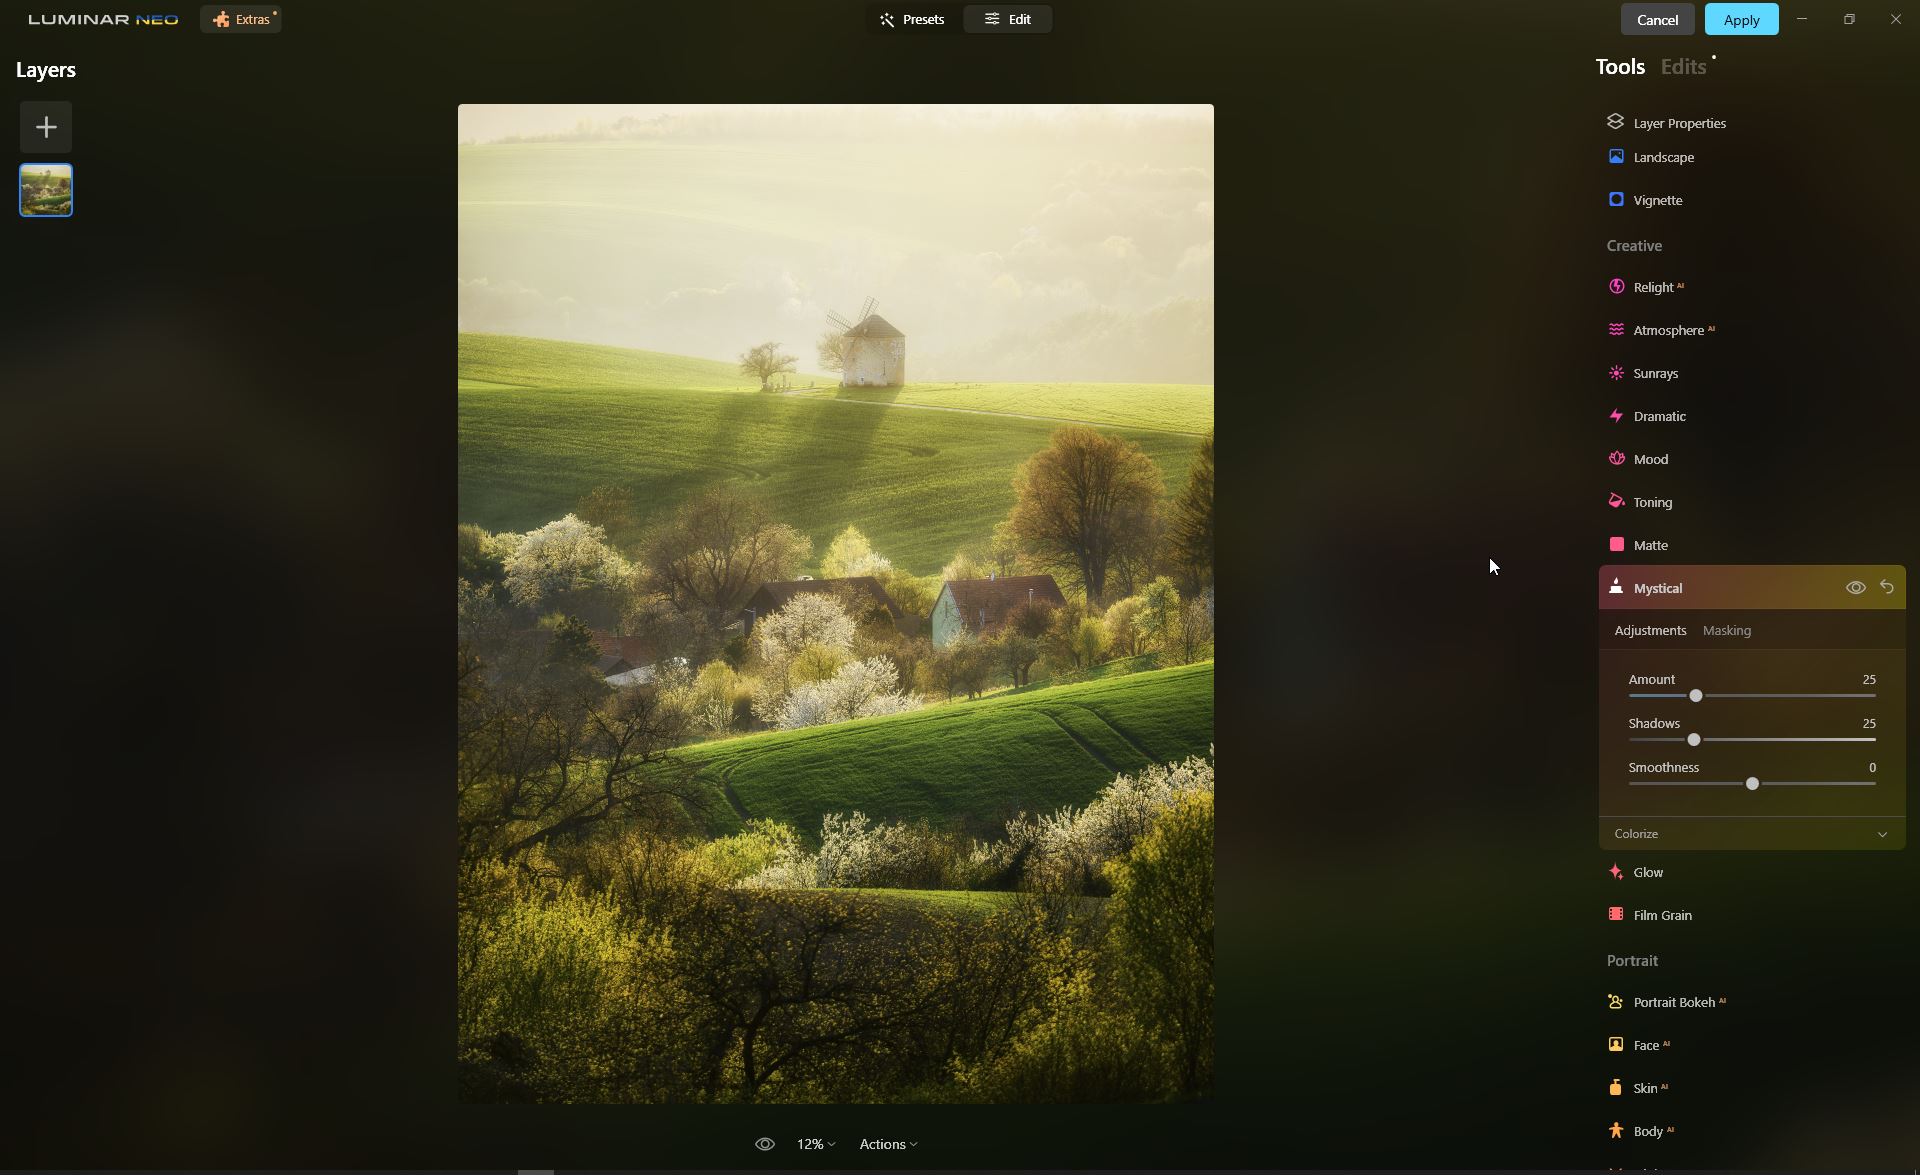
Mystical – subtle edit for adding some dreamingness
I’ve known Luminar mainly as AI photo editing software, where the AI is supposed to do the work for you, sort of, without much control over the output. That certainly wasn’t something I was interested in. But I gradually discovered its potential for the kind of precision photo work I’m used to with Photoshop.
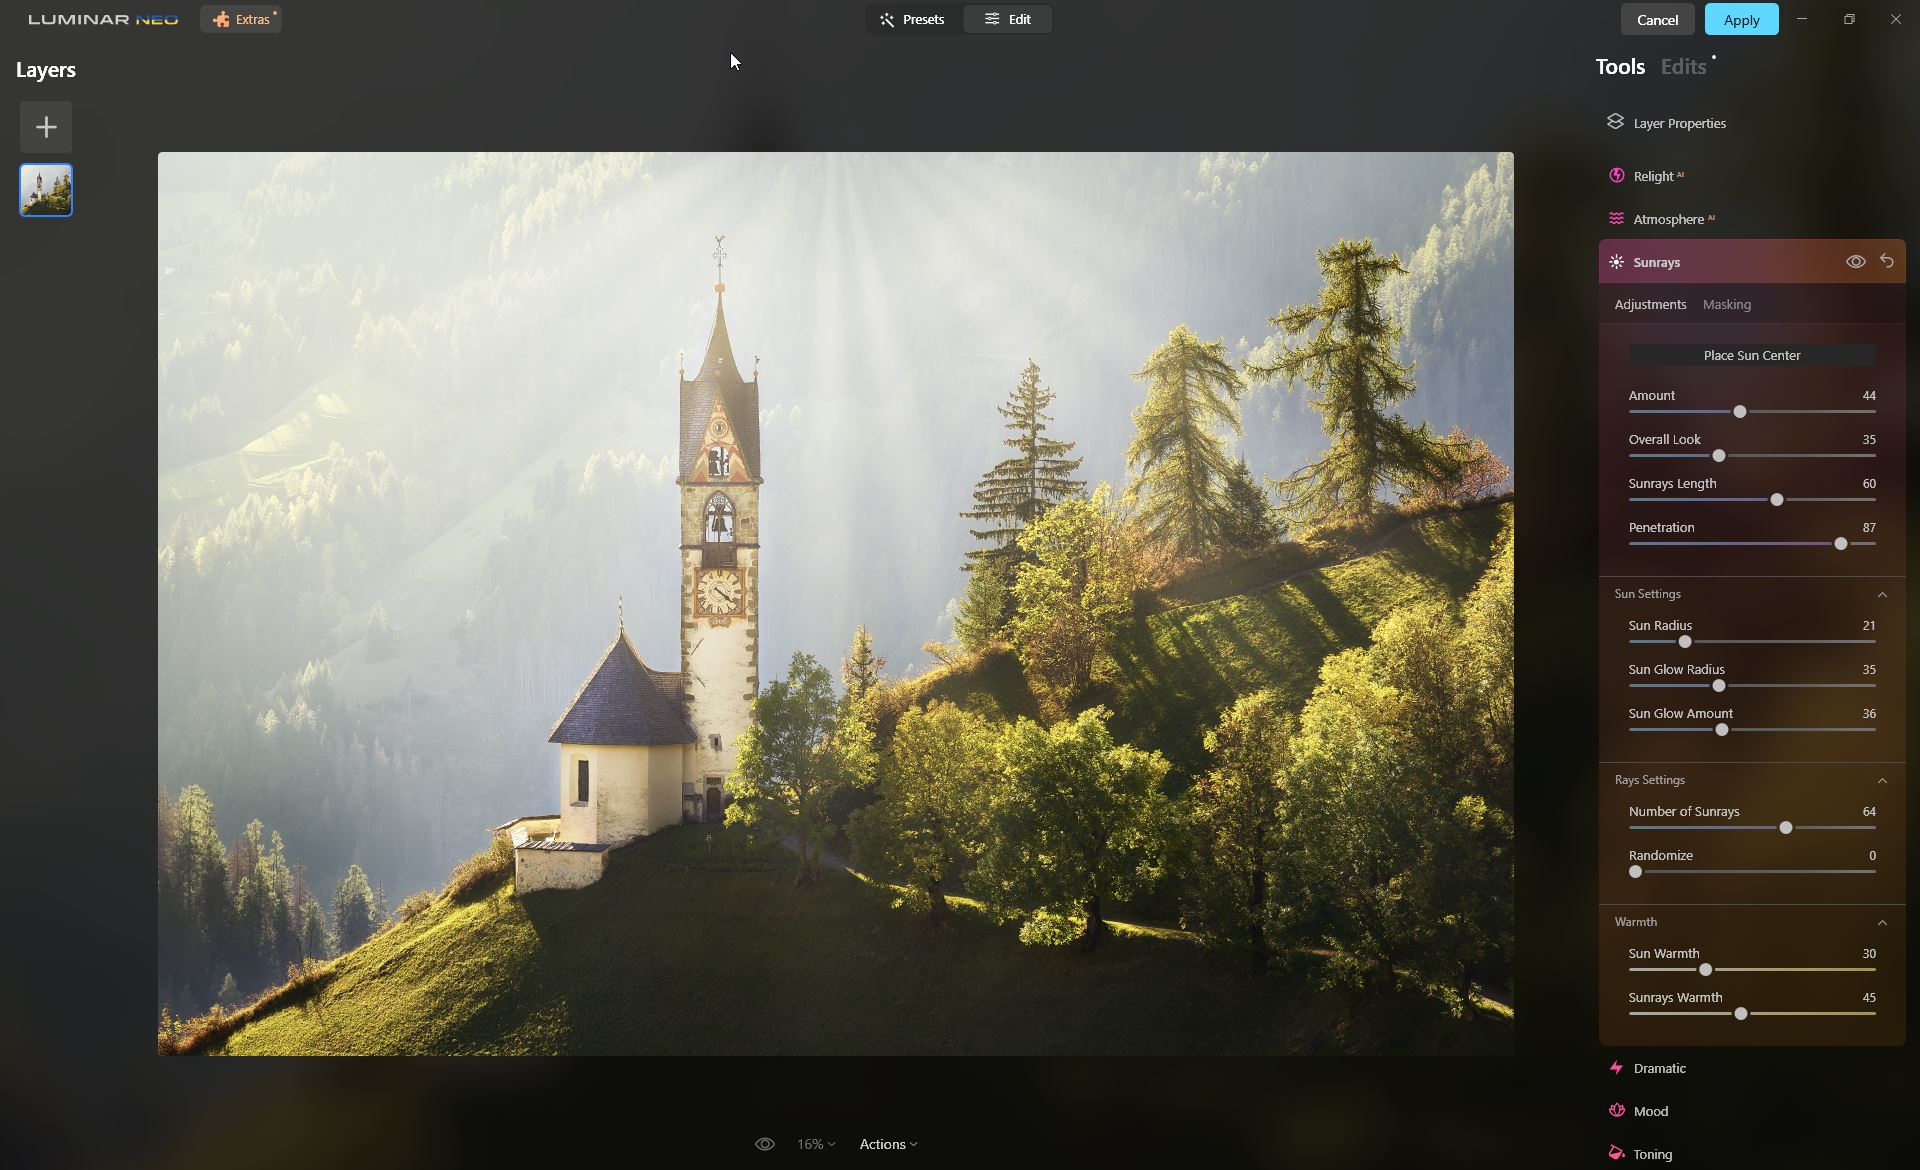 Sunrays filter – noticable sunrays, which can feel a bit artificial

Sunrays – reduced effect for gentle emphasizing of the light haze and radiant atmosphere
To me, the power of Luminar is not in making it an essential part of the post process instead of Lightroom or Photoshop and editing would be based on it, but rather in making it sensitively integrated into my existing way of working with photos.
It is possible to overdo things and push things to the extreme with Luminar (but so is Photoshop), but that’s not what one is looking for. The magic is in the subtle dosing of its selected features at the very finish of photo editing. It’s kind of the icing on the cake or the spice in the sauce – you can do without it, but Luminar adds a little bit of that shine, or rather atmosphere, to a photo and helps bring it to life when handled sensitively.
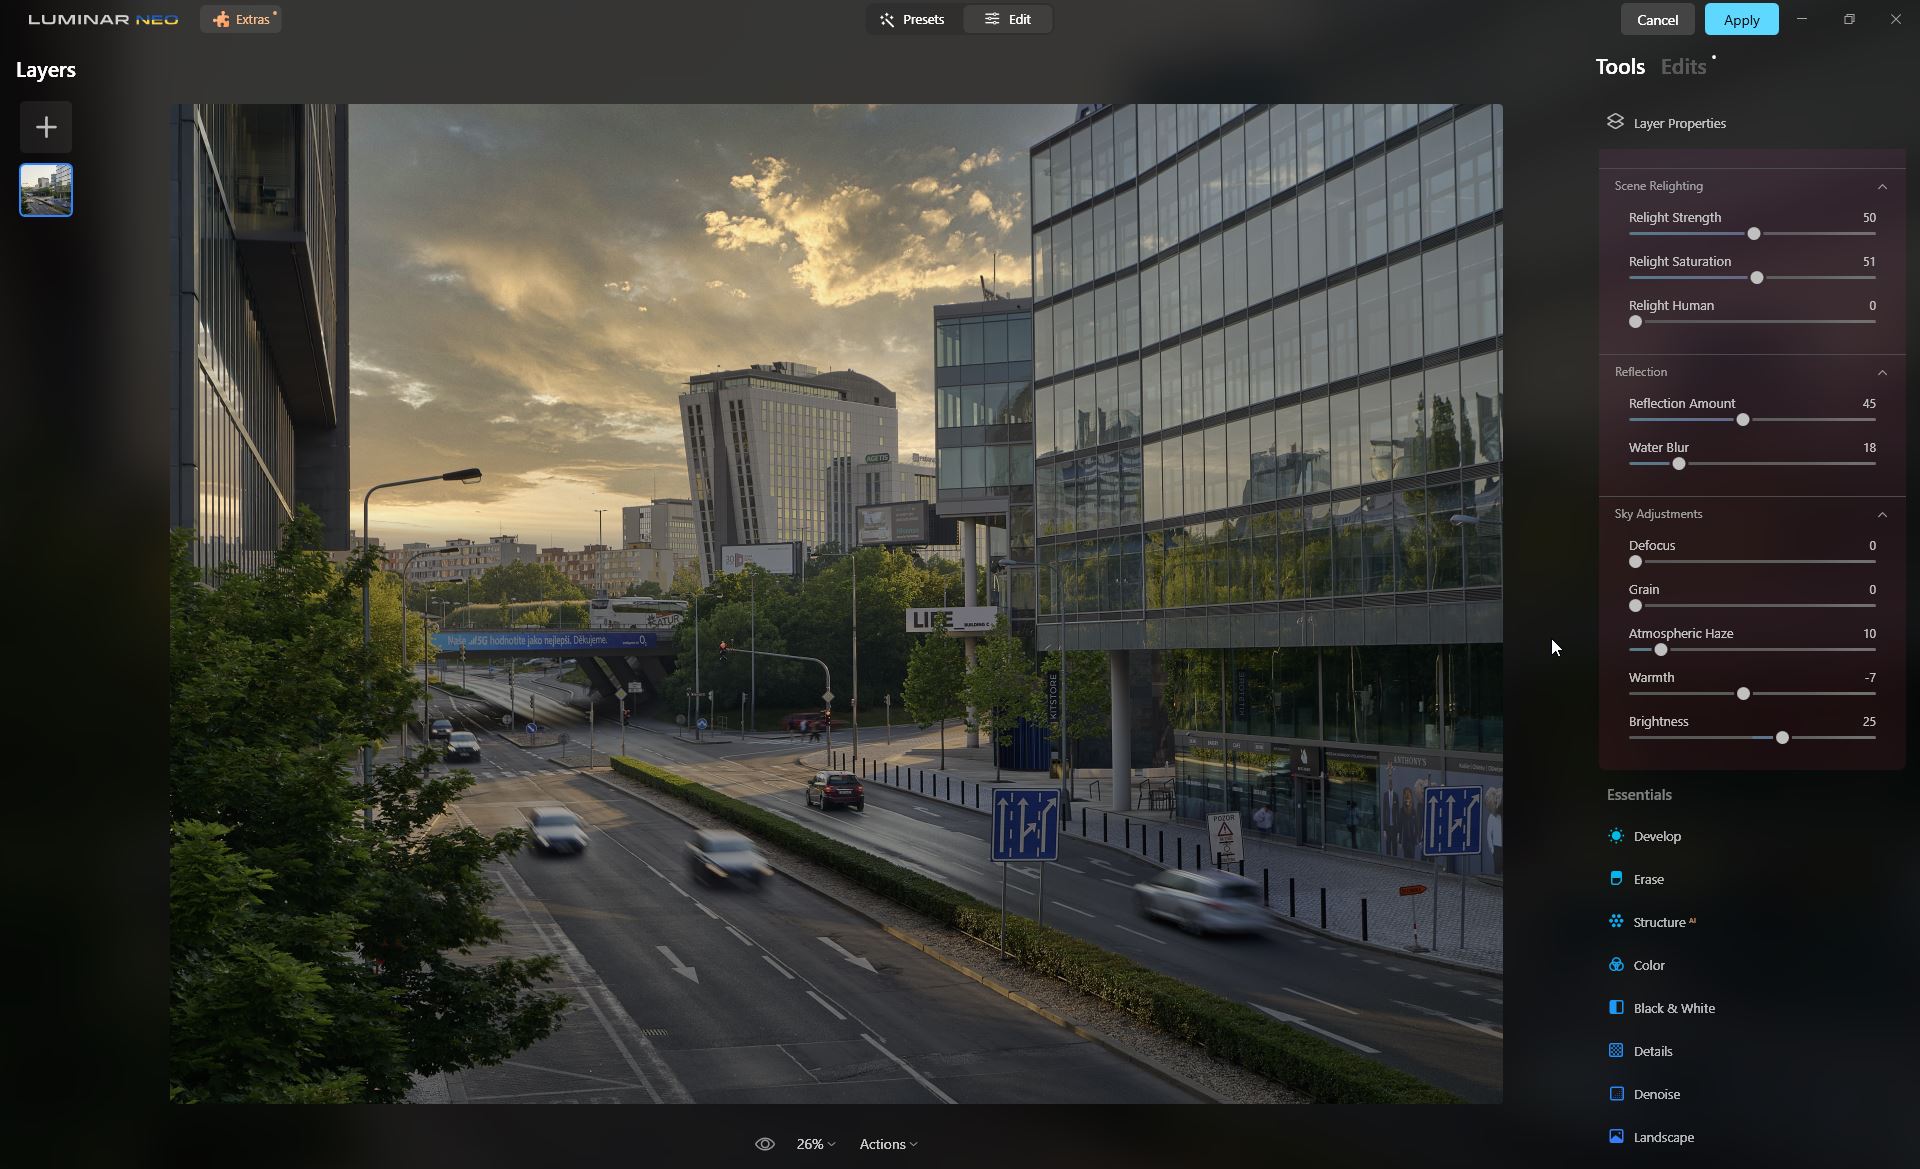
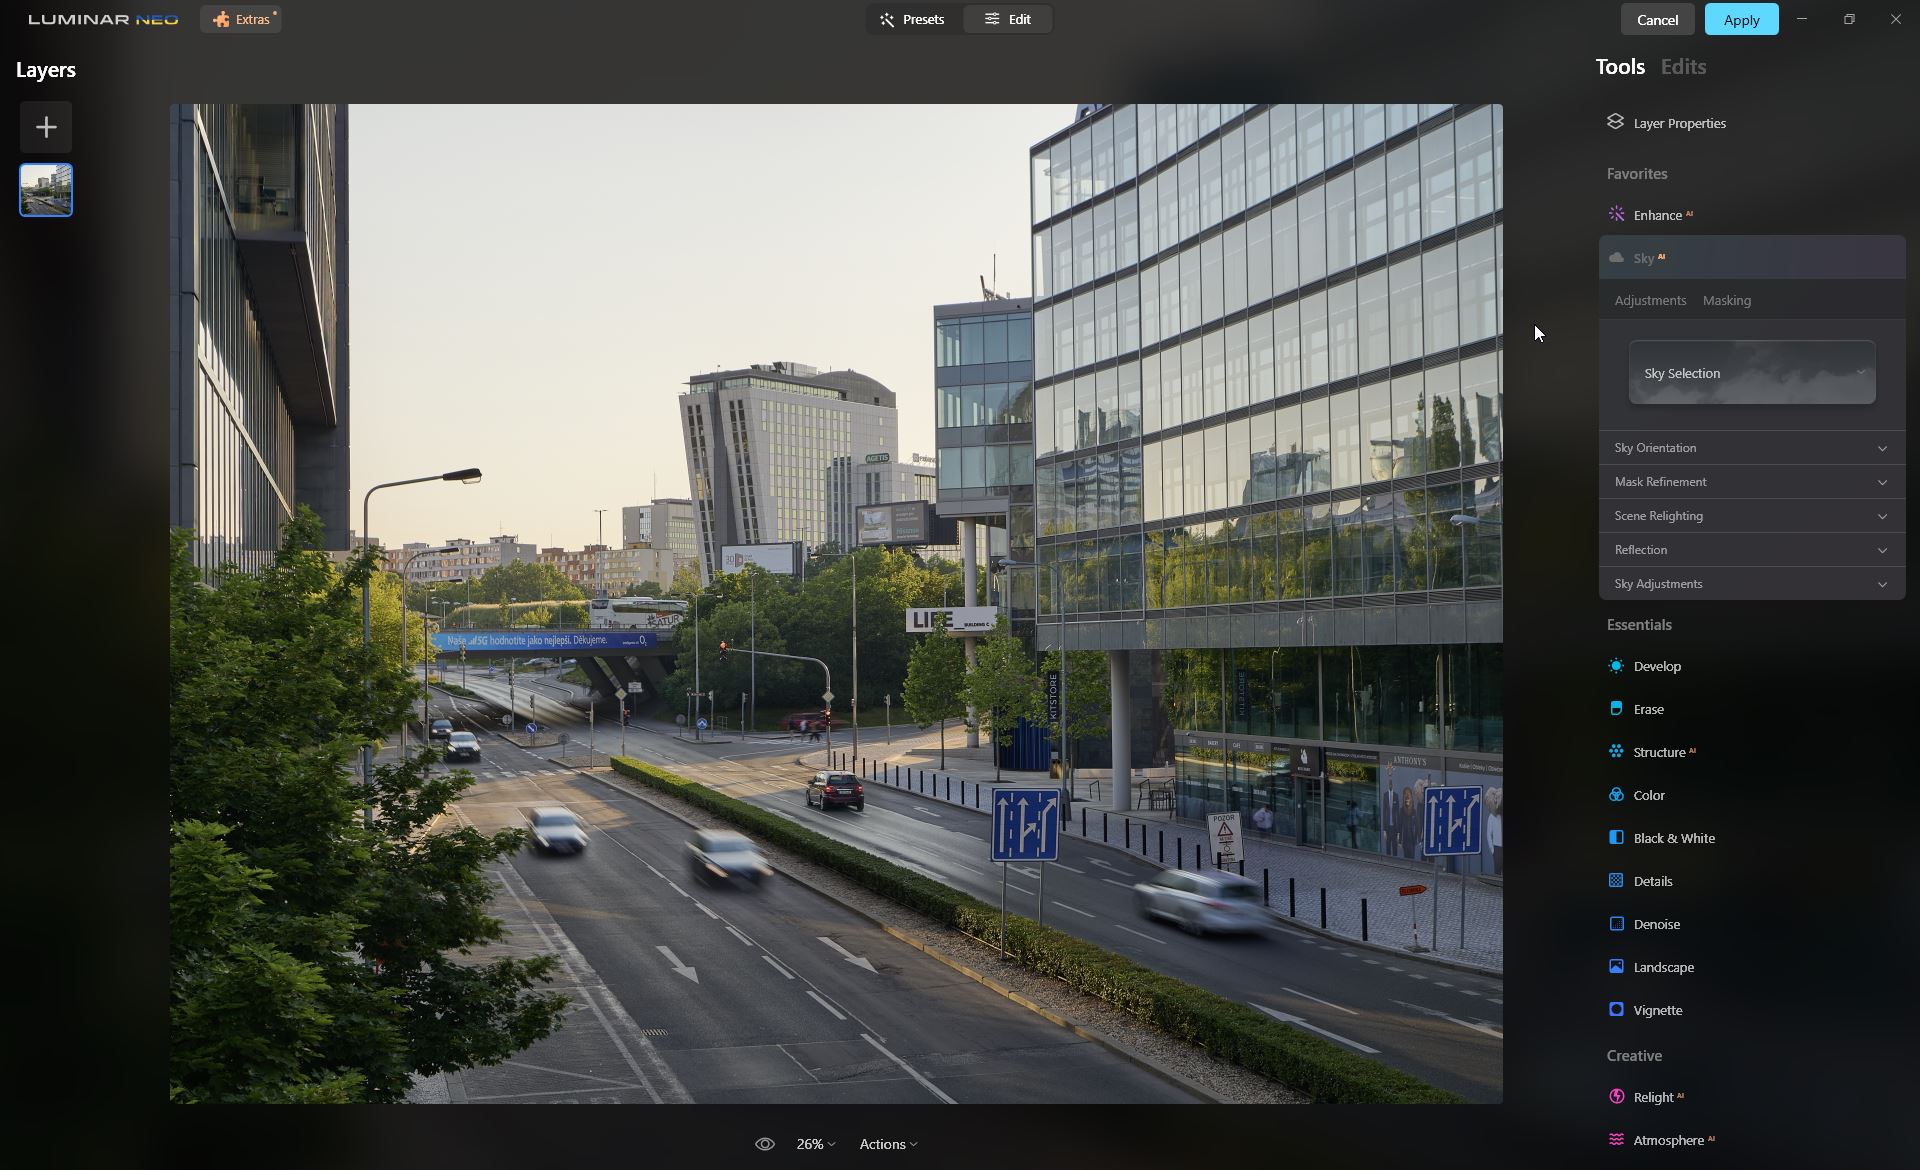 The Sky feature – sky replacement
The Sky feature – sky replacement
Example for all – you can rigidly add artificial sun to the photo. An experienced (and sometimes probably even inexperienced) eye can tell, but it has to be said that it doesn’t look bad. However, I certainly don’t intend to work with photos this way (i.e. putting an artificial sun somewhere it has no business being) – but if you work sensitively with this tool, you can place the artificial sun where the real sun is and just help bring out the atmosphere by adding a few rays, or better yet, a light haze.
For commissioned architecture photography, the Sky feature is very handy for tweaking or completely replacing the sky. In landscapes, I consider it an extreme option where everything else in the photo works well and only an unattractive/boring sky spoils it. I still try to avoid it though. In architecture, though, it’s a great feature, as it’s not so much about authenticity (at least not in terms of momentary weather conditions) and it’s all about the final image. This feature then makes it possible to insert your own sky, or some of the presets. It is also possible to buy different skies. The great thing is that this feature can also unify and in a way “re-light” the whole scene to match the inserted sky.
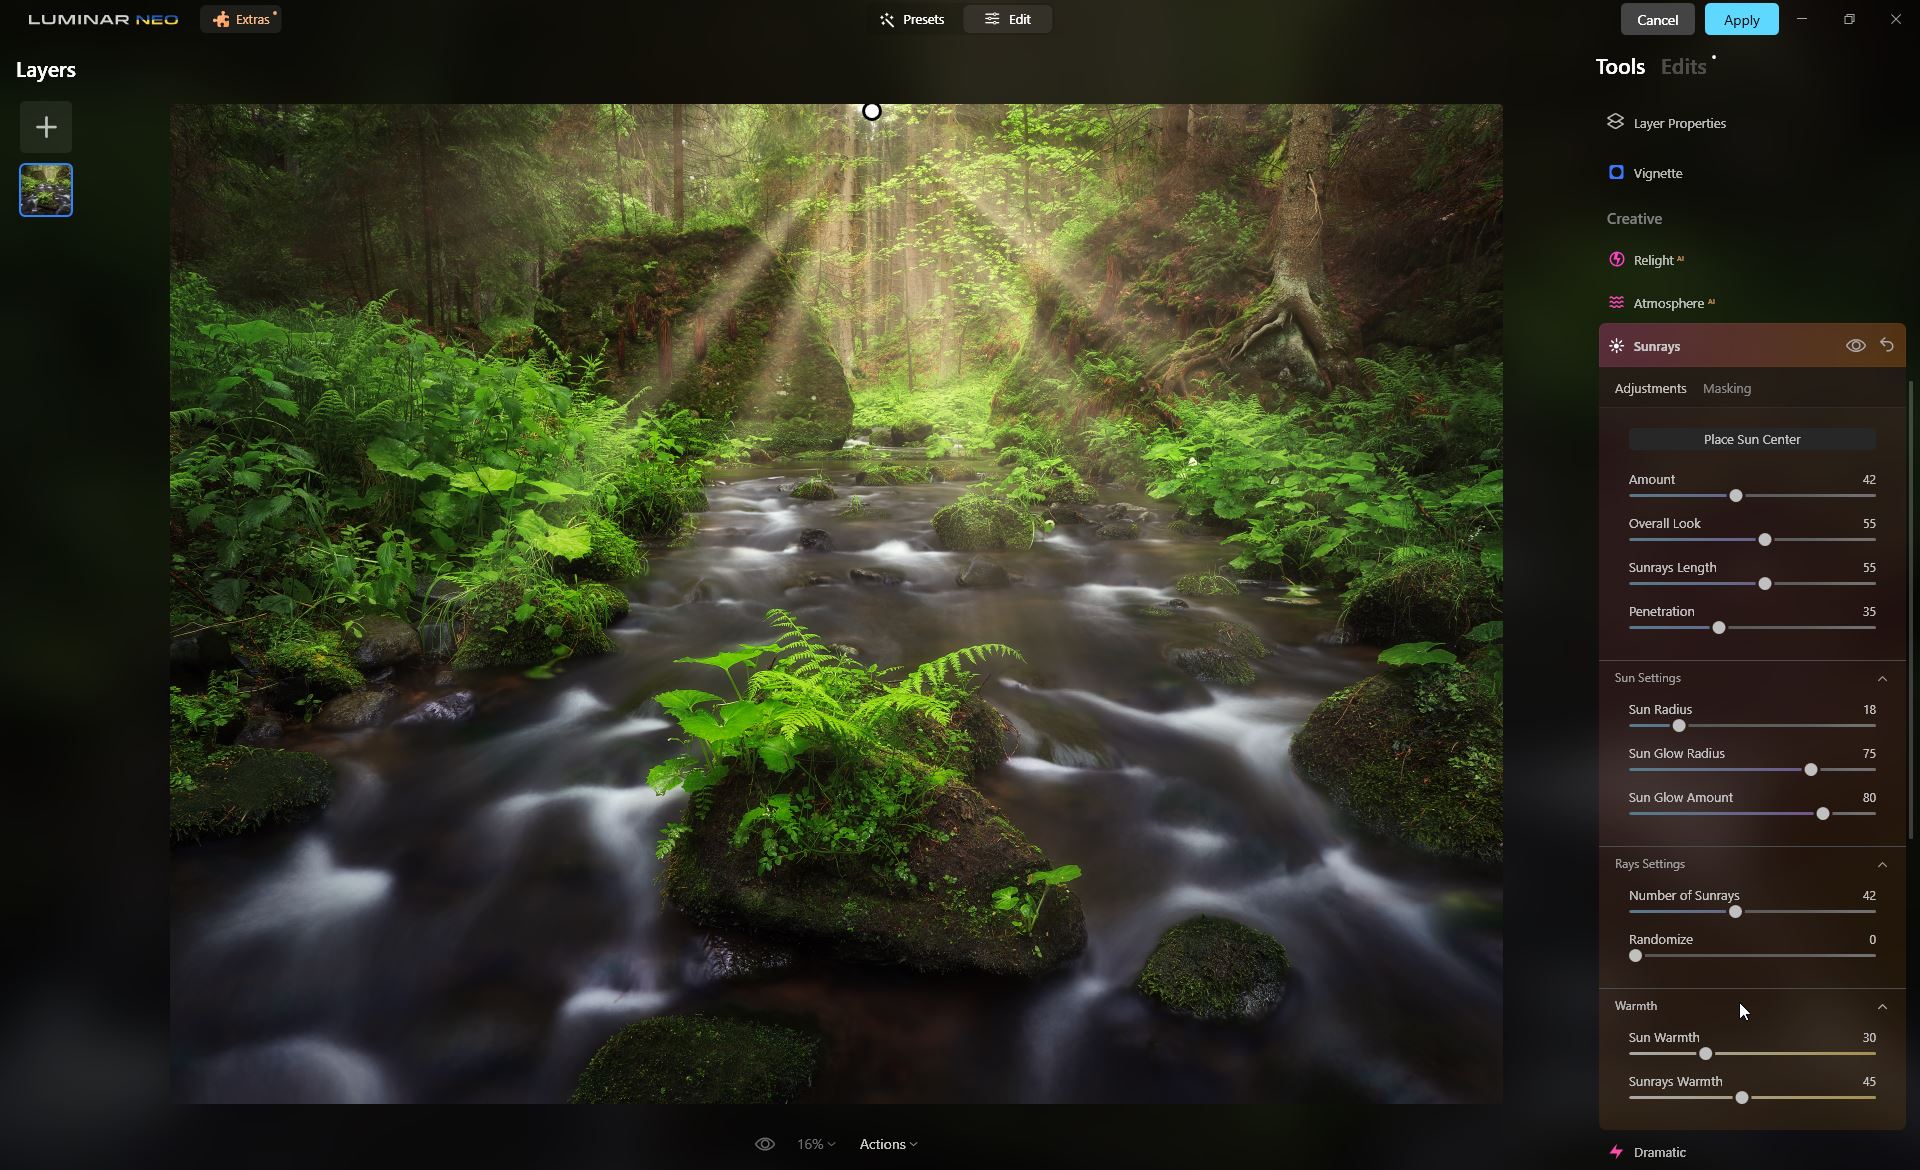 The Sunrays filter – distinctively noticable sunrays with a long reach
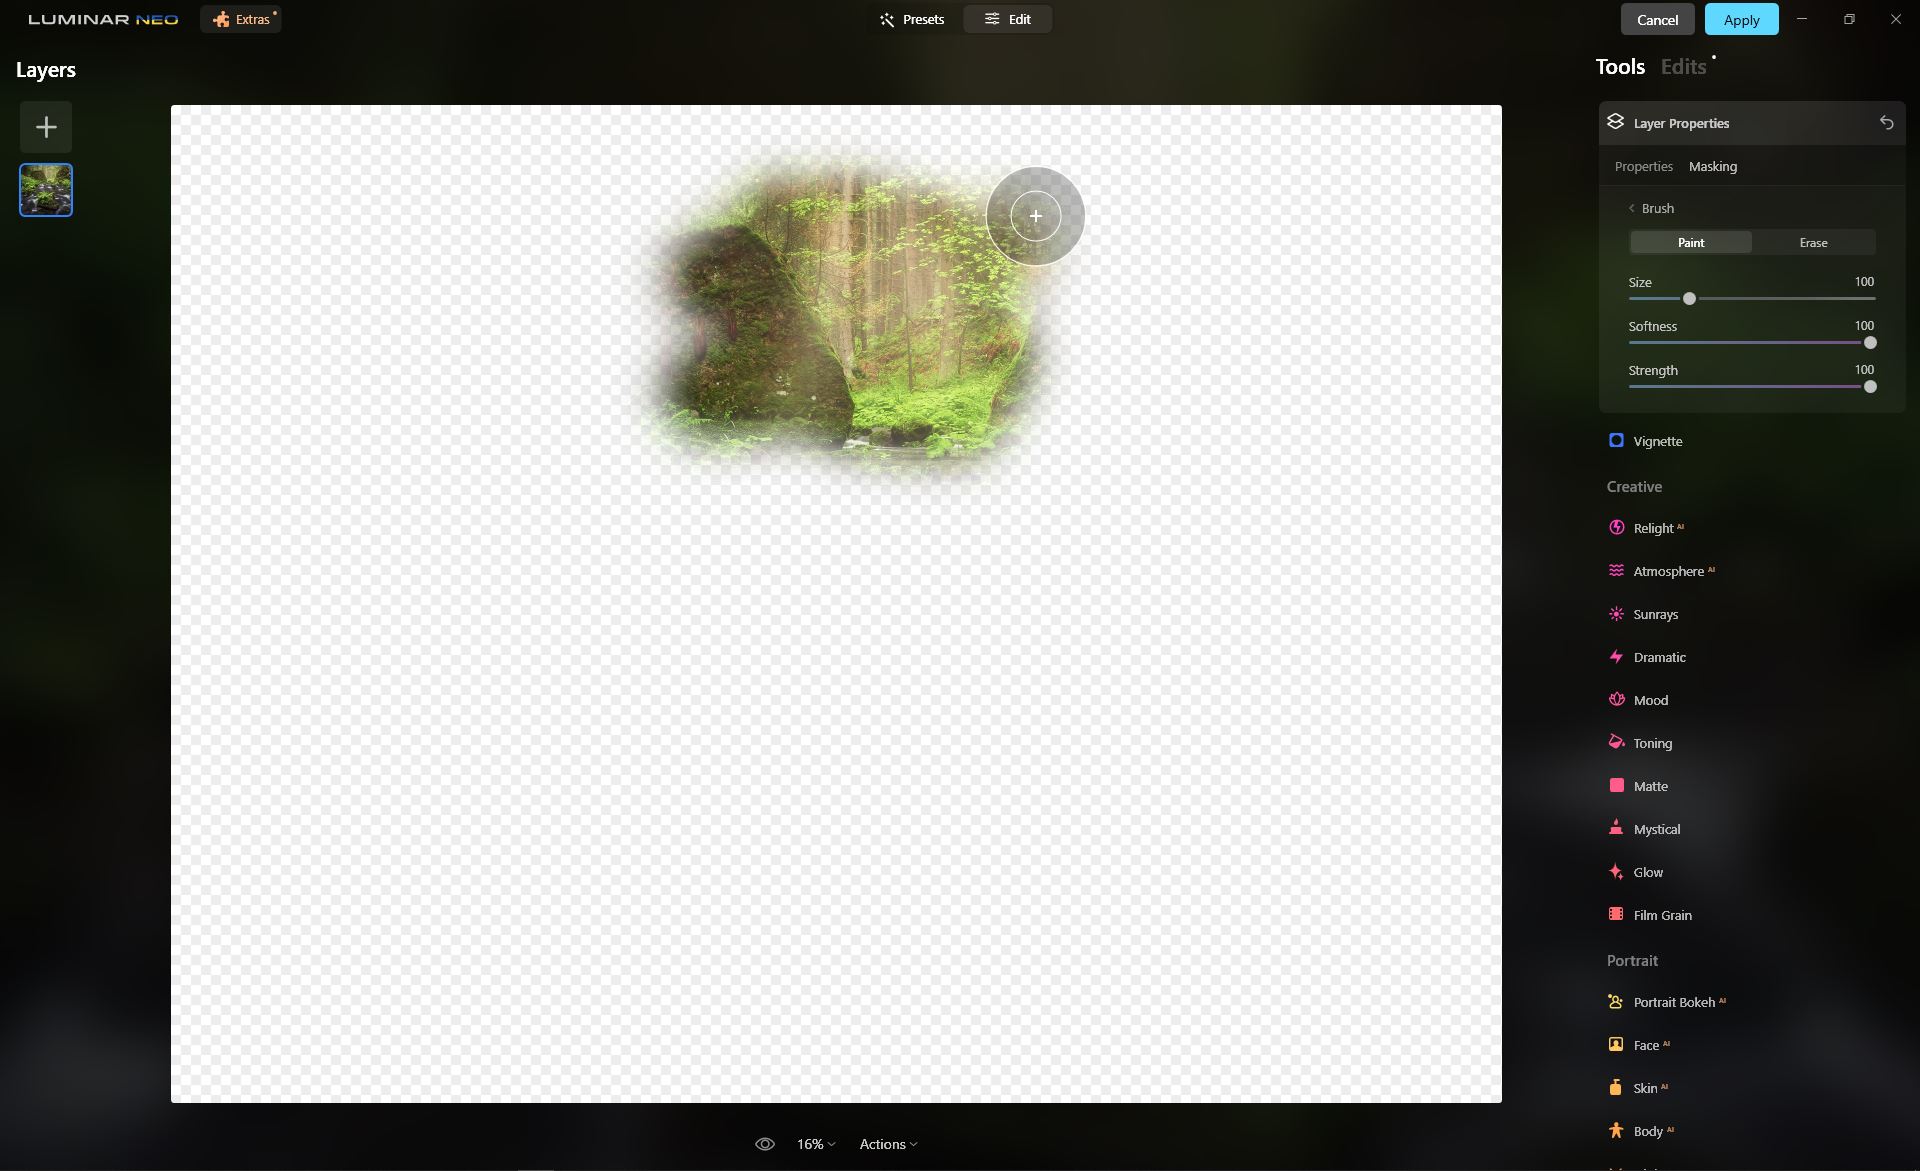 Masking – limiting the effect to just a small area
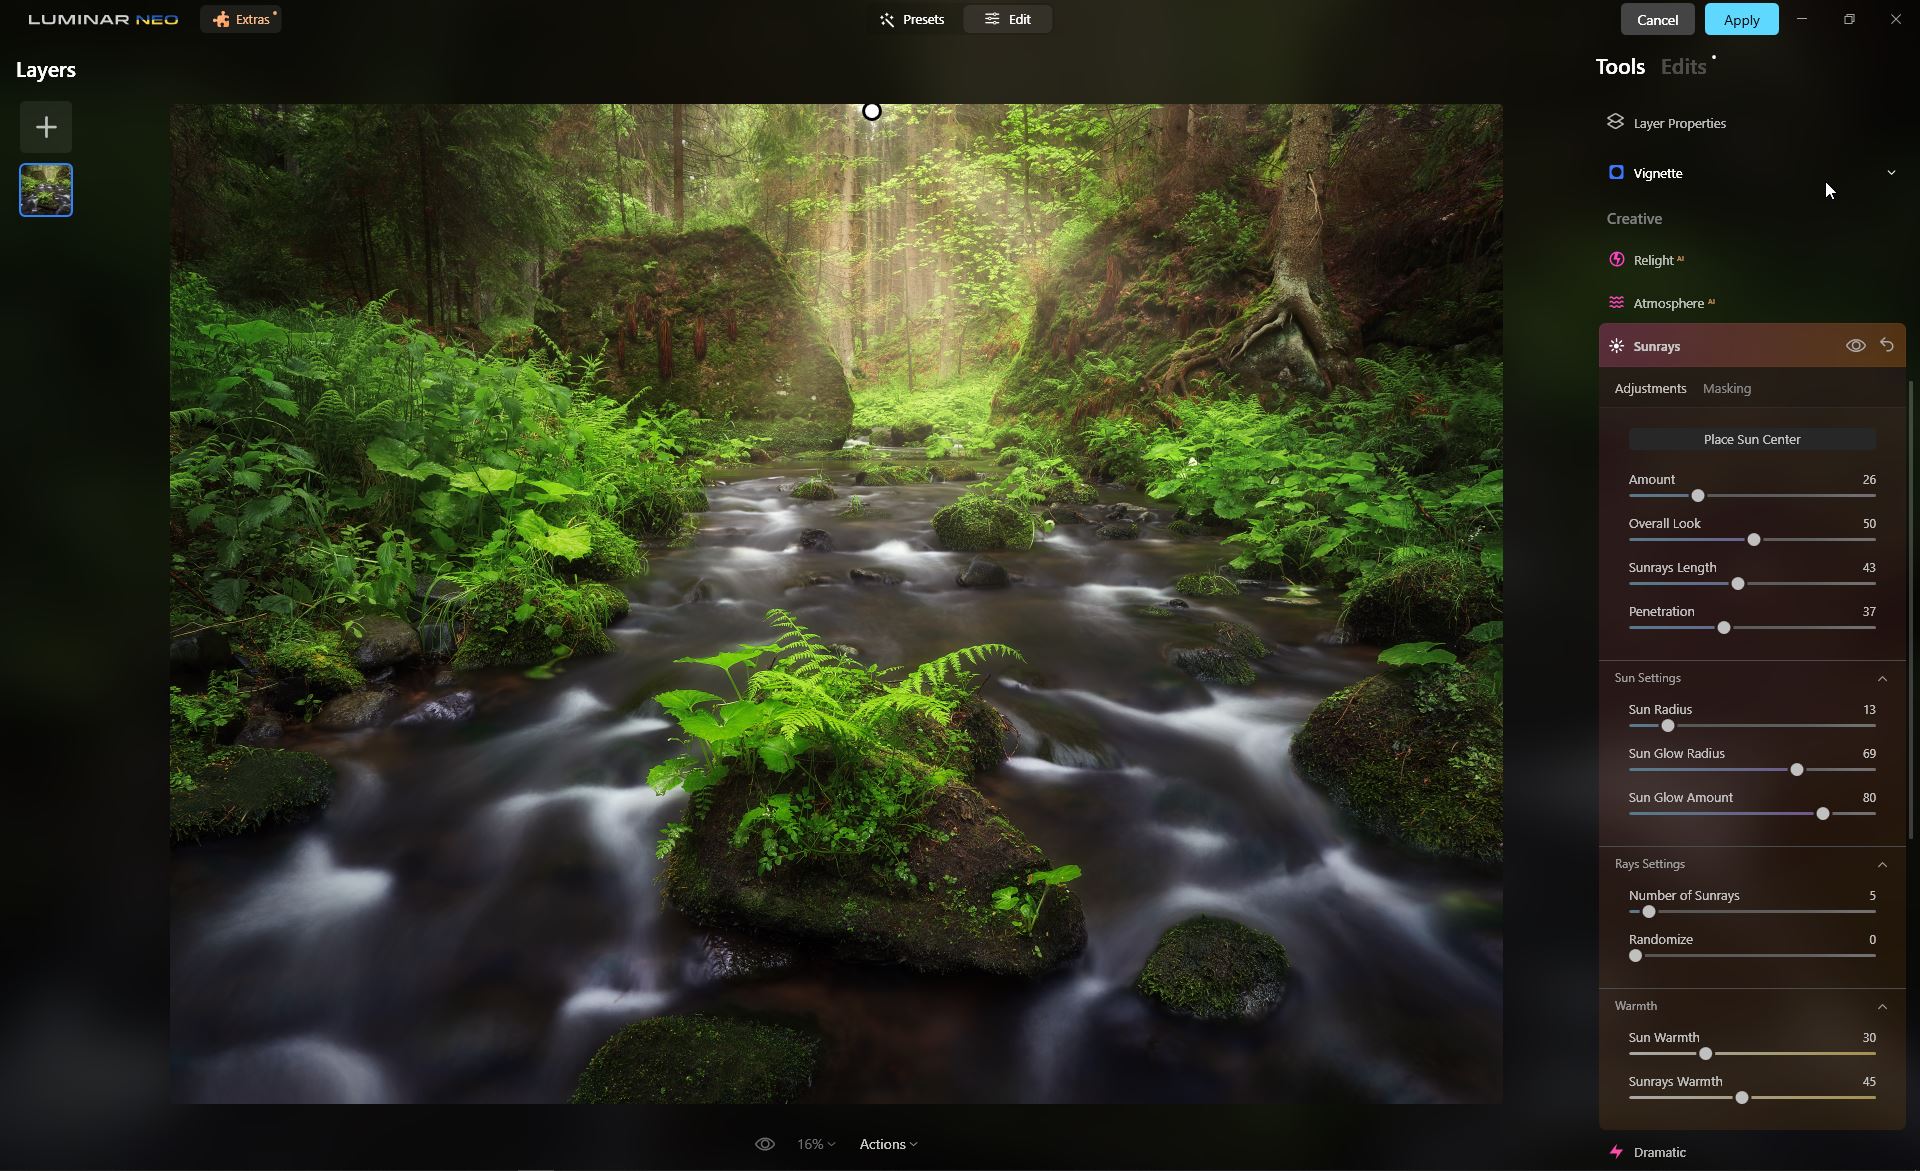
The final effect after masking and reducing the strenght of the effect
Importantly, in addition to fine-tuning a specific effect with sliders, you can also work with masks, just like in Photoshop or Lightroom. This allows you to achieve even more precise dosing of a given effect only in selected areas of the photo.
FUNCTIONS THAT I USE IN LUMINAR SO FAR (AND NOT ALWAYS):
Structure (AI) – emphasizing fine textures and details
Landscape (Dehaze; Golden hour) – remove haze and emphasize the glow and colors of the golden hour
Relight (AI) – lighten the background vs. darken the foreground ( rather rarely)
Sunrays – adding sunrays / light haze
Mystical – adding dreaminess in the manner of the Orton effect
That’s about it, while I don’t always use all the features, and even when I do, it’s usually only a few percent. I could do without it, but as I wrote above – Luminar can add a bit of that spice to photos and is great for final tweaking and polishing of a photo into its final look. I can highly recommend it for this kind of work.